


Building a Shoe Rack: A Practical Planning Guide
Quick Answer
Build a shoe rack only after measuring the usable space, counting the footwear and choosing a design that suits your tools, materials, humidity and safety needs. A simple open rack can work well, but a ready-made option may be more practical when you need predictable dimensions, a finished surface or minimal assembly.
Definitions
Usable space
The portion of the intended area that can safely hold the rack after accounting for doors, skirting boards, walkways, plugs, damp areas and access for cleaning.
Rack capacity
The number of shoe pairs the rack can accommodate while preserving usable shelf space and access; it should include some spare room for future additions.
Shelf clearance
The vertical distance between shelf surfaces, measured to accommodate the tallest footwear intended for that level.
Open shelving
A rack design with exposed shelves or gaps that allows easier access and generally supports airflow and visibility.
Wet-footwear zone
A designated lower or removable area where damp shoes can drain and dry without damaging the rest of the rack or floor.
Building a Shoe Rack: Start With the Decision, Not the Cut List
A useful shoe rack begins with planning, not a cutting diagram. The best design depends on the space available, the number and type of shoes you own, the tools you can use safely, the materials you can maintain and the conditions around the rack.
This guide focuses on freestanding shoe racks for an entryway, foyer, mudroom or similar practical storage area. It does not cover built-in wardrobes, structural alterations or advanced cabinetry. The aim is to help you choose whether to build a straightforward rack or buy one that already fits the job.
- Measure the location and check how people move through it.
- Count shoes by type rather than estimating from one pair.
- Plan for cleaning, ventilation, damp footwear and stability before choosing materials.
- Compare the full DIY effort with a ready-made alternative before purchasing anything.
1. Measure the Available Space and Your Shoe Collection
Measure the maximum width, depth and height where the rack will sit. Then reduce those figures to the usable space: account for door swing, skirting boards, uneven flooring, nearby walls, walking clearance and enough room to sweep or vacuum around the unit.
Next, count pairs by category. Everyday shoes, sandals, sneakers, boots and occasional footwear often need different shelf clearances. Identify the widest pair and the tallest pair, including high-tops or boots, because these set the limits for individual shelves.
Leave some reserve capacity rather than designing a rack that is completely full on day one. Your measurements will point you towards a narrow rack, a compact low rack, a taller vertical design or a larger shared-storage solution.
- Measure at the narrowest point, not only across the open floor.
- Mark door paths and walking routes before deciding on rack depth.
- Check whether skirting boards will prevent the rack from sitting flush against the wall.
- Record the height and width of the footwear that is hardest to store.
2. Calculate Rack Capacity and Shelf Spacing
There is no universal number of pairs that a shoe rack must hold. Capacity depends on shelf width and depth, shoe size, whether pairs sit side by side or heel to toe, and how much space you need to remove them comfortably.
Start by deciding how many pairs can sit across one shelf without squeezing or overlapping them. Multiply that by the number of shelf levels that fit within your available height, while allowing for the frame, feet and shelf thicknesses.
Give sandals and flats less vertical clearance than sneakers and everyday shoes. Reserve a taller level for boots or high-tops instead of making every shelf taller than necessary. A small gap above each pair improves visibility and makes shoes easier to lift out.
Before cutting materials, lay out the proposed footprint with paper or masking tape. Place a few representative pairs inside that outline to test access, depth and circulation in the room.
- Use dedicated tall storage for tall footwear where possible.
- Test your planned orientation with the widest pair you own.
- Avoid counting a tightly packed shelf as practical everyday capacity.
- Retain a little empty room for new pairs and easier retrieval.
3. Choose Materials Based on Tools, Budget, Humidity and Use
Wood can suit a warmer-looking rack when you have appropriate cutting, drilling, sanding and finishing tools. Its final result depends on the timber, joinery, finish and where the rack will be used. Keep wood surfaces protected from repeated moisture exposure.
Bamboo may suit a natural-looking open rack when the material is properly finished and not exposed to prolonged dampness. Engineered wood offers straight, consistent panels, but its surfaces and especially its edges need care around water. Metal can create an open, lightweight-looking structure when joints are secure and corrosion protection is appropriate. Plastic can be easy to wipe in a practical, wet-footwear setting, subject to the stability and intended use of the design.
Choose fasteners, brackets and finishes that are compatible with the material. Follow manufacturer guidance for panels, hardware and coatings rather than assuming that one screw or finish suits every construction.
- Choose wood when you can make accurate cuts and maintain a protective finish.
- Consider engineered wood only where edges and surfaces can be kept away from repeated dampness.
- Use metal with secure joints and a finish suited to its environment.
- Choose easy-wipe materials when the rack will frequently receive dusty or damp shoes.
4. Plan Ventilation, Cleaning Access and Wet-Footwear Handling
Open shelves or deliberate gaps can improve visibility and allow air to move around stored shoes. They do not, however, replace drying: wet footwear should drain and dry before it is stored tightly alongside other pairs.
Plan a lower wet-footwear zone with a removable tray, washable mat or another surface that suits both the floor and rack material. This makes mud and drips easier to contain, while helping protect the floor beneath the rack.
Do not push the rack so tightly into a corner that dust and debris cannot be reached. Decide how you will wipe, vacuum or remove items from each shelf before final assembly.
- Use a removable, cleanable surface for damp or muddy footwear.
- Add a floor-protective layer where water or cleaning products may reach the floor.
- Leave enough access behind or beside the rack for routine cleaning.
- Avoid enclosing shoes while they are still wet.
5. Assemble, Brace and Anchor the Rack Safely
Prepare accurate measurements, square panels or cuts, compatible fasteners, a level, a drill or screwdriver and suitable protective equipment. Assemble on a flat surface, checking that the frame remains square before fully tightening the joints.
A rack needs resistance to wobbling as well as enough support for its shelves. Depending on the design, this may involve back bracing, side panels, cross supports or approved hardware. The right approach depends on the dimensions, materials, joints and installation details.
Tall, narrow or heavily used racks can pose a tip risk. Consider anchoring them to a suitable wall using hardware appropriate to the rack and wall type. Keep heavier footwear on lower shelves, and stop using the rack if it rocks, splits, bends or develops loose joints.
Do not assume a universal load rating for a DIY rack. Its safe capacity depends on the material, dimensions, shelf supports, joint design, fasteners and assembly quality.
- Check the frame for square before tightening every joint.
- Use bracing or supports where the design needs resistance to racking.
- Do not rely on uneven floors or unstable feet to hold a tall rack steady.
- Inspect fasteners and joints after the rack has been in use.
6. Choose the Right Placement and Maintenance Routine
Entryways and foyers usually benefit from quick access, compact depth and easy sweeping. Mudrooms and balconies need more attention to dampness, drainage, sunlight, dust and the suitability of the rack finish.
Keep the rack outside door paths and narrow walking routes. In a shared home, simple zones or labels can prevent footwear from spreading beyond the rack and make capacity easier to manage.
Maintain the rack by cleaning spills promptly, tightening hardware periodically and checking for moisture damage, corrosion or loosened joints. Avoid placing wet shoes directly against wood or engineered-wood surfaces.
- Prioritise compact depth where circulation is limited.
- Keep outdoor-exposed locations in mind when selecting materials and finishes.
- Assign shelves or zones by household member when storage is shared.
- Review the rack after seasonal changes in footwear, such as adding boots.
7. Decide When Buying a Ready-Made Shoe Rack Is More Practical
Build when you have an unusual but straightforward space, access to suitable tools and a clear reason to value a custom fit. A simple open rack is often the most manageable DIY format because it keeps the design focused on shelf spacing, access and stable assembly.
Buy when you need predictable dimensions, faster setup, a finished appearance or less uncertainty around assembly. This can be especially sensible for renters and for anyone who does not want to cut, finish, drill or repair materials.
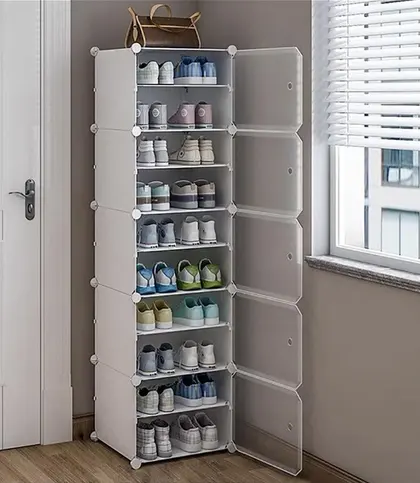
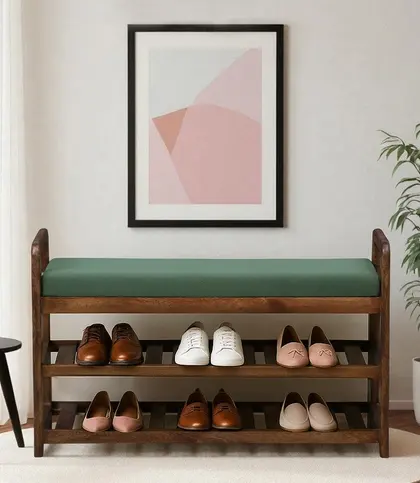
Compare the whole DIY total, including panels or timber, fasteners, finish, tools, delivery, waste, possible mistakes and your time. Then compare it with a ready-made rack that meets your measured space and footwear needs. Footwear Vault 5 Tier Shoe Racks - Black and CleanStep Grey Plastic & Metal Shoe Racks are examples of ready-made open-storage alternatives to consider during that comparison; their suitability still depends on their dimensions, placement and intended use.
- Build for a custom fit when the design remains simple and manageable.
- Buy when speed, finished surfaces or predictable sizing matter most.
- Compare total project inputs, not only the initial material cost.
- Judge both options by capacity, airflow, cleaning access and stability.
Quick Shoe-Rack Planning Checklist
Use this checklist before buying materials or committing to a ready-made rack. It helps prevent a design that looks suitable on paper but blocks a door, traps damp shoes or lacks room for the footwear you actually use.
- Usable width, depth and height measured at the narrowest and lowest points.
- Door swing, walkway, skirting-board and cleaning clearances checked.
- Current pairs counted, with spare capacity included.
- Tallest and widest footwear identified.
- Shelf clearances assigned by footwear type.
- Material matched to available tools, budget, humidity and cleaning needs.
- Wet-footwear area and floor protection planned.
- Bracing, level feet and wall anchoring considered.
- DIY cost and effort compared with a ready-made alternative.
FAQs About Building a Shoe Rack
The right shoe rack is the one that fits the available space, stores the footwear you use and remains easy to clean and stable in daily use. Exact dimensions, capacity and material choices should always be checked against your own design.
When a ready-made shoe rack is the better fit
If the measured space, available tools, or anchoring plan makes a DIY build impractical, compare these ready-made shoe racks against the dimensions and capacity worksheet above. The examples include plastic-and-metal and mango-wood constructions, plus a five-tier format.
Verify overall width, height, depth, usable shelf spacing, assembly, load guidance, ventilation, cleaning access, and wet-footwear suitability before choosing.
₹3,549
₹5,400
34%OFF
₹8,549
₹18,999
55%OFF

₹764
₹1,299
41%OFF

Final Verdict
- Build a shoe rack when you have measured a straightforward space, understand your footwear mix, can access suitable tools and value a custom fit enough to justify the work.
- Choose a ready-made rack when speed, predictable dimensions, finished surfaces or reduced project complexity matter more than customisation.
- Whichever route you choose, check capacity, shelf clearance, airflow, wet-footwear handling, cleaning access and stability before making the final decision.
FAQs
How many pairs must a shoe rack hold?
It should hold your current collection by footwear type, plus modest spare room. There is no fixed capacity because shelf width, shoe size, storage orientation and access needs all vary.
What dimensions should a shoe rack have?
Its width, depth and height should fit the usable space after allowing for doors, walkways, skirting boards and cleaning access. Test the proposed footprint on the floor before building.
What is the best material for a DIY shoe rack?
There is no single best material. Choose based on your tools, budget, desired finish, humidity, cleaning needs and ability to protect surfaces from moisture.
How much shelf spacing is needed for shoes?
Use less clearance for sandals and flats, medium clearance for most sneakers and everyday shoes, and a dedicated taller shelf for boots or high-tops. Check your own tallest pair before finalising the layout.
How do I stop a shoe rack from tipping?
Keep heavy shoes low, make sure the rack sits level, use suitable bracing and consider anchoring tall or narrow designs to an appropriate wall with compatible hardware.
How should a shoe rack handle wet footwear?
Create a lower wet-footwear zone with a removable tray or washable mat, protect the floor and allow damp shoes to drain and dry before storing them tightly with other shoes.
How can I improve airflow in a shoe rack?
Use open shelves or deliberate gaps, avoid overpacking and leave enough access around the rack for cleaning. Airflow helps circulation but does not replace drying wet footwear first.
Is it better to build or buy a shoe rack?
Build if a simple custom fit is valuable and you have suitable tools and skills. Buy if you need quick setup, predictable dimensions, finished surfaces or less assembly uncertainty.