


Windchime Making: Materials, Size and Safe Placement Guide
Quick Answer
Start by choosing where the windchime will hang and how much sound the space can accommodate. Then select lightweight, suitable materials, leave clear space for movement, use a support rated for the finished weight, and test balance at a low height before final hanging.
Definitions
Clapper
The central moving piece that strikes tubes, shells, or other sound-making elements when the windchime moves.
Sail
The lower hanging piece that catches airflow and helps move the clapper.
Suspension line
The cord, chain, or other support that holds the windchime from its top point.
Windchime scale
The overall size, length, number of sound elements, and weight of the finished hanging decor.
1. Plan the Windchime’s Design, Sound, and Location
Choose the location before collecting materials. An indoor accent, sheltered entryway, balcony and garden each place different demands on weight, weather resistance, clearance and sound level. Notice how much airflow the spot receives and what sits nearby, including windows, railings, doors and seating.
Set a style direction that suits the room or outdoor corner. Metal generally gives a clearer, brighter ring; bamboo and wood usually create a softer, warmer effect; and shells make a lighter, more delicate sound. These are broad tendencies rather than guaranteed pitches, as spacing, weight and airflow also affect the result.
A mixed wood-and-metal design can suit a bohemian or natural decor direction. Choose a finish and combination of materials that coordinates with the surrounding furniture, planters or entryway details.
- Decide whether the chime is for an indoor accent, balcony, entryway or garden.
- Measure the available vertical drop and side clearance.
- Choose a preferred material and an acceptable sound level.
- Check whether the spot has gentle airflow or frequent strong gusts.
- Avoid a noisy design beside a bed, focused work area or frequently opened window.
- Identify a sound hanging point before building.
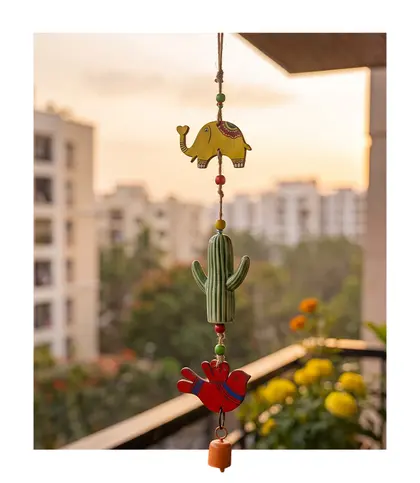 FastDelivery
₹549
₹729
25%OFF
2. Choose Materials for Indoor or Outdoor Windchimes
Match materials to exposure. Metal is resonant and durable, although its finish may tarnish, rust or discolour over time depending on the metal, coating and weather. Bamboo and wood work well for natural or rustic designs, but outdoor-facing pieces need a finish suited to the specific material and periodic checks for wear.
Shells, beads and other decorative pieces can make a chime feel personal and light. Shells can chip or crack, so use them in sheltered areas unless they are prepared for outdoor conditions. Make sure every cord, bead and decorative element is light enough for the support and suitable for the intended exposure.
For outdoor projects, choose corrosion-resistant hooks, sturdy cord or chain, sealed wood where appropriate and pieces without sharp edges. Indoors, appearance, manageable weight and compatibility with the room matter more than maximum weather resistance. A compact metal arrangement can be a useful visual reference, while beads can add colour and detail when they are secured with suitable cord.
- Metal: bright, clear sound and a contemporary or classic look; inspect its finish outdoors.
- Bamboo and wood: softer sound and natural texture; protect exposed surfaces with an appropriate finish.
- Shells: light, decorative movement; best kept sheltered if they are delicate.
- Beads and spacers: use only when their weight, holes and weather resistance suit the chosen cord.
- Cord or chain: select a strong option that resists fraying, stretching or corrosion in its location.
 FastDelivery
₹277
₹799
65%OFF
 FastDelivery
₹479
₹899
47%OFF
3. Select Tube or Shell Dimensions, Spacing, and Weight
The dimensions of the sound elements influence both the look and the sound. Longer or larger tubes generally produce lower, fuller tones, while shorter or smaller pieces tend to sound higher and lighter. This is a practical guide rather than an exact tuning method, because material, thickness, clapper contact and airflow also matter.
Heavier components need a stronger suspension and may move less in a gentle breeze. Very light pieces respond easily, but their sound can be quieter or more delicate. Mix lengths for visual rhythm and varied tones, while leaving enough vertical and side space for every strand to move freely.
Small windchimes are easiest to use on compact balconies, at entryways and as indoor accents. Medium designs suit many sheltered home locations. Large designs need more clearance, a sturdy fixing point and thoughtful placement so they do not strike a wall, railing or window. Use the overall visual scale as a guide, rather than expecting a particular shape or material to predict exact sound performance.
- Place the clapper near the active sound elements so it can make contact as the chime moves.
- Size the sail to catch airflow without pulling the whole design off-centre.
- Keep strands separated enough to avoid constant collisions and tangling.
- Allow extra clearance from glass, walls and railings.
- Choose the lightest practical scale that still suits the intended location.
 FastDelivery
₹524
₹1,299
60%OFF
4. Gather Components and Assemble the Windchime Safely
Keep the project simple by using pre-made tubes, shells, drilled craft pieces or ready-to-hang decorative elements. This avoids risky cutting or drilling and keeps the focus on safe, passive hanging decor. Gather a top support, suspension cord or chain, sound elements, a central clapper, a sail, optional beads or spacers, scissors, measuring tape and suitable hand tools for fastening the materials you have selected.
Work on a stable surface. Before tying anything, measure and label the strand lengths so the layout is easier to check. Smooth or cover sharp edges, keep small detachable pieces away from children and pets, and use suitable eye or hand protection when handling brittle, rigid or sharp materials.
Attach the sound elements around the top support. Run the central suspension line through the middle, position the clapper where it can reach the sound elements, then add the sail below it. Secure every knot, but leave the moving parts room to swing naturally. Do not add electrical, motorised or power-tool-based components.
- Lay out the design flat before assembly to confirm spacing and strand order.
- Use a stable top ring, disc, branch-like craft support or other purpose-made support with no weak cracks.
- Double-check knots and fastenings before adding the clapper and sail.
- Keep the clapper central rather than pressed against one side.
- Trim loose cord ends only after the first balance test.
5. Balance, Suspend, and Place the Windchime Securely
Test the finished windchime at a low height from its intended top point. The support should sit level, the strands should hang without tangling and the clapper should be able to reach the sound elements. If one side dips, redistribute strand positions or adjust line lengths. If the sail pulls the design sideways, reduce its weight or reposition it until the chime settles centrally.
Use a hook, ceiling point, beam, balcony fixture or wall support that is rated for the windchime’s weight and appropriate for the surface. Check its condition before use. Adhesive hooks are not automatically suitable outdoors or for moving weight, especially where wind and moisture are present.
Choose a location with enough gentle airflow to activate the chime, but keep it clear of doors, walkways, fragile glass, electrical lines, hot surfaces and places where it could hit people or pets. In a living room, a small, lightweight design works best away from busy circulation paths and at a height that avoids head contact while remaining accessible for inspection. A small-scale design can help visualise a balcony or entryway placement.
- Lift and test the chime before final hanging.
- Confirm the hook or support is suitable for both the weight and surface.
- Leave clear movement space on every side and below the sail.
- Avoid exposed positions that receive severe gusts unless the design and fixture are designed for them.
- Make sure the chime can be removed for cleaning or poor weather.
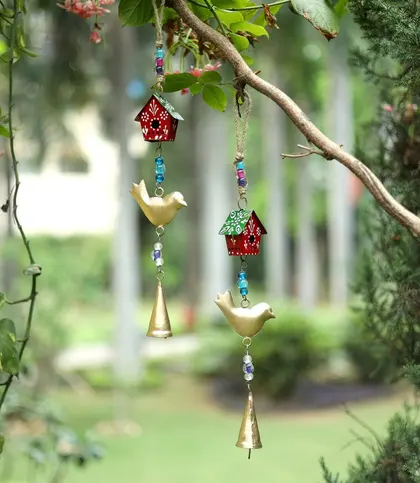
₹299
₹799
63%OFF
6. Clean and Protect Outdoor Windchimes from Weather
Inspect outdoor windchimes regularly, particularly after heavy rain or strong wind. Check the hook, top support, knots, cords, chains, beads and sound elements for fraying, cracks, rust, looseness or deformation. Replace compromised parts instead of continuing to hang a damaged chime.
Remove ordinary dust with a soft, dry cloth. For suitable non-porous materials, mild soapy water can be used sparingly, followed by wiping or rinsing as appropriate. Avoid soaking vulnerable cords, unfinished wood or bamboo, and dry every part thoroughly before rehanging.
Care needs vary by material and finish. Avoid abrasive cleaners that could remove coatings from metal or damage shells. Move delicate shell, paper, untreated wood or decorative fabric elements into a sheltered space during severe weather. A mixed-material chime may need different cleaning approaches for its metal, bead and wood components.
- Inspect fittings, cords and knots after rough weather.
- Clean gently and dry thoroughly before rehanging.
- Follow care directions for the specific metal finish, sealed wood, bamboo or shell material.
- Shelter delicate materials during severe weather.
- Replace frayed, cracked, rusted or loose components promptly.
DIY Windchime Safety and Placement Checklist
Use this final check before hanging the windchime at its permanent location. A well-planned chime should suit its setting, move freely without becoming a hazard and remain simple to inspect or take down when conditions change.
- Is each material appropriate for indoor use or the expected outdoor exposure?
- Is the total weight suitable for the hook, fixture or hanging support?
- Are all edges smooth and all knots, lines and connections secure?
- Can the clapper and sail move freely without hitting glass, walls, railings or people?
- Does the windchime stay balanced when lifted from its hanging point?
- Does the location offer airflow without causing excessive disturbance?
- Can the chime be removed easily for cleaning or severe weather?
Final Verdict
- Choose the location and desired sound first, then select the lightest practical material and scale that suit the airflow and hanging point.
- For a beginner-friendly project, use pre-made metal, bamboo, wood or shell elements in a small or medium design, with a centred clapper, secure top support and generous clearance for movement.
- Shelter outdoor designs where possible, inspect them regularly and take down or protect delicate components during severe weather.
FAQs
Which materials are best for making an indoor windchime?
For indoor use, metal, bamboo, wood and shells can all work well. Choose primarily by the sound and visual style you want, then make sure the chime is lightweight enough for its hanging point. Shells, beads and unfinished wood are often easier to maintain indoors because they are protected from rain and prolonged sun.
Can I use a homemade windchime outdoors?
Yes, provided its materials and hanging hardware suit the exposure. Use a secure support, weather-suitable cord or chain, corrosion-resistant hardware and protected wood where appropriate. Shelter delicate shells, untreated wood, fabric and paper-like decorations, and inspect the chime after severe weather.
How do tube length and weight affect windchime sound?
As a general tendency, longer or larger elements create lower, fuller tones, while shorter elements create higher, lighter tones. Heavier pieces may need more airflow to move and a stronger support. The final sound also depends on material, spacing, the clapper and local wind conditions.
What tools and parts are needed to make a windchime?
You will need a top support, suspension cord or chain, sound elements, a clapper, a sail, scissors, a measuring tape and appropriate hand tools for fastening. Optional beads or spacers can add detail. Pre-made tubes, shells and drilled craft pieces are a simple, lower-risk choice.
How do I balance and safely hang a windchime?
Lift it from the intended top point at a low height first. Adjust strand positions or lengths until the top support stays level, strands do not tangle and the clapper reaches the sound elements. Hang it only from a fixture rated for the chime’s weight and suited to the mounting surface.
Where should I place a windchime at home?
Choose a spot with gentle airflow and clear space around the chime, such as a sheltered balcony edge, open entryway or garden stand. Keep it away from doors, walkways, windows, railings, electrical lines and areas where it could strike people or pets. Use a small, quiet design in living spaces or near work areas.
How do I clean and protect an outdoor windchime?
Dust it with a soft dry cloth and inspect the support, cords and hardware regularly. Use mild soapy water only on suitable non-porous surfaces, avoid soaking unfinished wood or vulnerable cord, and dry everything before rehanging. Protect or bring in delicate materials during severe weather and replace worn components promptly.