


Pollinator Garden: A Practical Home Plan for Every Space
Quick Answer
A pollinator garden is a planned home growing space that provides food, shelter, water, and nesting opportunities for pollinating animals. Start with your site’s sunlight, wind, space, climate, and watering access, then choose regionally suitable nectar and host plants that can flower across the local growing seasons.
Definitions
Pollinator garden
A garden or group of containers designed to provide pollinators with resources such as nectar, pollen, host foliage, water, shelter, and nesting opportunities.
Nectar plant
A flowering plant that provides nectar for adult pollinators; many also provide pollen.
Host plant
A plant used by the immature life stages of particular insects, such as butterfly and moth caterpillars, for food or development.
Bloom continuity
A sequence of flowering periods that keeps suitable food available across multiple seasons rather than concentrating all blooms in one short period.
Pollinator
An animal that transfers pollen between flowers, including bees, butterflies, moths, hoverflies, beetles and, in some regions, birds or bats.
Pollinator Garden: A Practical Plan for Any Home
A pollinator garden can be as modest as a few well-chosen containers or as expansive as an in-ground bed. What matters most is matching the garden to real conditions: available light, local climate, wind, planting space, water access, and the time you can give it.
Rather than relying on a universal plant list, assess the site first, select suitable nectar and host plants, arrange them in useful groups, add simple water and shelter, and maintain the space with minimal chemical intervention. A small garden that you can observe and care for consistently is a practical contribution to local habitat.
- Even a compact outdoor planting can offer a stopping point for some local pollinators.
- Different visitors use gardens differently, so aim to support a range of insects rather than every possible species.
- Expect to adjust the plan as you learn which plants thrive and when food gaps occur.
1. Assess Your Sunlight, Space, Climate, and Time
Watch the intended spot over a clear day before buying plants. Record whether it receives full sun, partial sun, bright shade, or shade, but read plant labels with care: the same label can perform differently in hot, humid, dry, or cool climates.
Measure the usable area and note practical conditions that are easy to overlook, including reflected heat from walls, strong wind, rainfall exposure, drainage, and the distance to a water source. On a balcony or roof, confirm building rules, drainage arrangements, railing security, and load-bearing limits before adding containers.
Choose a scale that suits your routine. A few containers grouped by similar watering needs are usually easier to manage than a crowded mixed planting with different demands. A tiered planter stand can help use vertical space, provided every plant still receives suitable light and the arrangement is stable. A straightforward outdoor planter can be useful where no garden bed is available, after checking drainage, stability, and root room.
- Small sunny balcony: begin with a few well-drained containers and plants verified for your local sun and wind conditions.
- Shaded balcony: choose shade-tolerant plants confirmed for the local climate; do not force sun-loving species to cope with low light.
- Terrace: allow for heat, wind, surface protection, and access around larger containers.
- In-ground garden: reserve manageable clusters for plants with similar light and moisture needs.
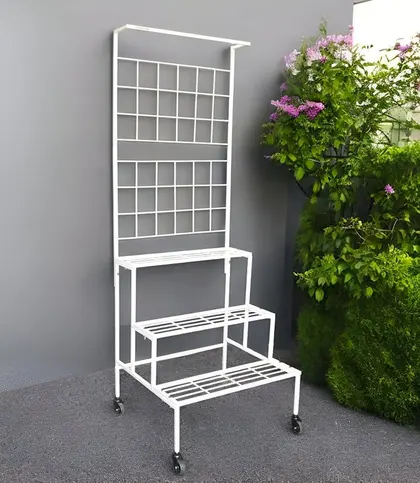 FastDelivery
₹2,415
₹5,999
60%OFF
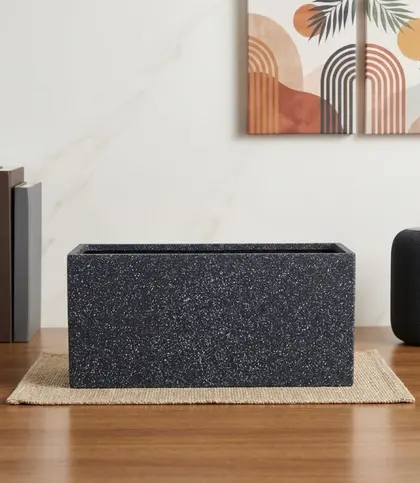
From ₹1,567
₹3,199
50%OFF
2. Choose Regional Nectar and Host Plants
Prioritise plants that are locally native or well adapted to your region when they are available and appropriate for your exact site. A local native-plant nursery, botanical garden, conservation organisation, or horticultural extension service can help verify suitability, local invasiveness concerns, and likely flowering periods.
Build two layers into the plan. Nectar plants feed many adult visitors, while host plants support the young stages of particular butterflies or moths. The best mix depends on which pollinators occur locally, so it is more useful to select several locally validated species than to copy a distant planting list.
Include variation in flower shape, colour, and size. Long-tubed, open, clustered, and flat flowers can be useful to different visitors, but every plant still needs to suit your soil, light, rainfall pattern, and container or bed conditions.
When possible, ask nurseries about growing practices. Healthy plants grown without systemic insecticides are a more cautious choice for a habitat planting, though claims should be confirmed rather than assumed.
- Check mature size before planting so containers and spacing can support the root system.
- Select for the conditions you have, not the conditions you hope to create.
- Use a diverse, manageable mix instead of relying on one spectacular but short-lived display.
3. Plan Flowers Across the Seasons
A garden is more useful when it offers food beyond one brief flowering flush. Make a simple local calendar and look for plants that flower in early, middle, and later parts of your growing season. Their exact timing can shift with weather, cultivar, pruning, rainfall, and temperature.
Combine compatible species so that one starts as another fades. This approach gives you a clearer view of gaps while reducing the risk that all flowers finish at once.
Where safe and tidy enough for your setting, leave selected stems, seed heads, and leaf litter through part of the dormant period. These materials may offer cover or overwintering sites, although their value depends on local species and site conditions.
- Mark expected flowering windows, then revise them based on what happens in your garden.
- Replace plants that repeatedly struggle rather than increasing watering or inputs beyond what you can sustain.
- Remove diseased material or anything that creates a safety concern, even if you retain other natural debris.
4. Group Plants for Easier Foraging and Care
Planting several of the same species together in a small cluster or drift can make flowers easier for pollinators to locate than scattering individual plants throughout the space. It also makes watering, feeding, observation, and seasonal maintenance more straightforward.
Group plants with similar light and moisture requirements. In an in-ground bed, place taller plants behind shorter ones where they will not shade them excessively. On a terrace, a larger non-hanging planter can help hold a compatible group, provided it is stable and appropriate for the available space.
Leave enough room to reach the soil. You will need access for watering, checking leaves and stems, removing weeds by hand, and deadheading where that suits the plant and your bloom plan.
- Repeat a small number of suitable plants rather than collecting many incompatible ones.
- Avoid crowding containers until airflow and watering become difficult.
- Position taller or wind-sensitive plants with exposure in mind.
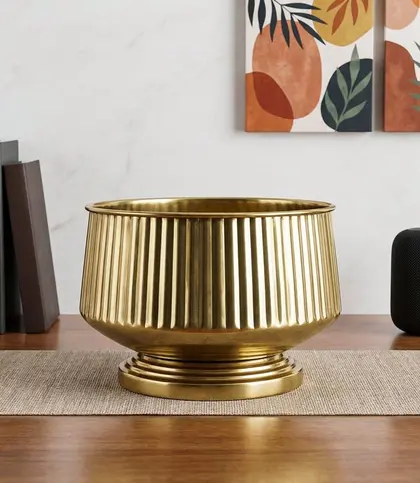 FastDelivery
₹1,447
₹2,999
52%OFF
5. Add Safe Water, Shelter, and Nesting Features
Plants are the foundation, but pollinators also need places to drink, rest, and in some cases nest. A shallow dish or saucer with stones, twigs, or another textured landing surface offers a safer drinking point than deep, open water.
Refresh the water regularly and clean the vessel to limit stagnation. A shallow dish does not eliminate mosquito concerns, so frequent attention is important.
If the site allows, leave a small area of bare, well-drained soil for ground-nesting insects. Hollow stems, leaf litter, and small pieces of woody material can also provide shelter. Keep these features dry where possible, positioned safely, and proportionate to the available space.
- Choose accessible, shallow water rather than decorative deep-water features.
- Keep nesting and shelter areas away from paths where they will be regularly disturbed.
- Prioritise habitat function and safety over ornament.
6. Maintain the Garden Without Routine Pesticides
Inspect plants regularly, identify a problem before treating it, and accept that some leaf damage may be part of a working habitat. Caterpillars, for example, may be using a host plant as intended.
Use the least disruptive response first: hand-pick pests where appropriate, prune affected growth, improve airflow, correct watering, pull competing weeds, and use physical barriers when suitable. These steps often address small problems without exposing visiting insects to unnecessary chemicals.
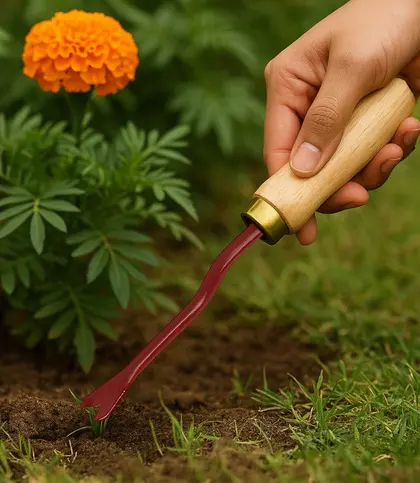
A trowel and fork set can assist with planting, loosening soil, and routine container or bed care, while a hand weeder supports non-chemical removal of competing weeds. Avoid broad-spectrum insecticides, and never spray open flowers or active pollinators. If treatment is unavoidable, follow the product label and local safety guidance exactly. Be especially cautious with systemic insecticides and pesticide-treated nursery stock because residues can affect non-target insects.
- Remove diseased or hazardous plant material as needed, while retaining useful healthy stems and leaf litter where practical.
- Water at the soil rather than soaking foliage when plant disease is a concern.
- Observe first, act second, and choose a targeted response over routine spraying.
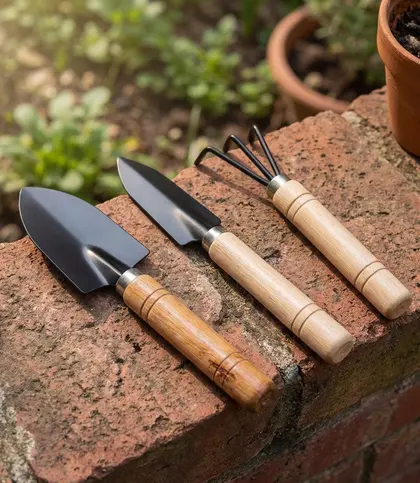 FastDelivery
₹277
₹639
57%OFF
 FastDelivery
₹140
₹459
69%OFF
7. Adapt the Plan for Balconies, Terraces, and Compact Gardens
A balcony can support a small pollinator planting when containers are stable, well drained, and suited to the building’s rules and capacity. Account for wind, drainage runoff, heat reflection, and safe placement before you plant. Lightweight containers may be easier to manage, but stability remains essential.
On a terrace, larger containers can make a more substantial planting possible. Protect the surface from water damage, leave access for care, and select plants that can cope with the exposure. Grouping containers also helps create a clearer watering routine.
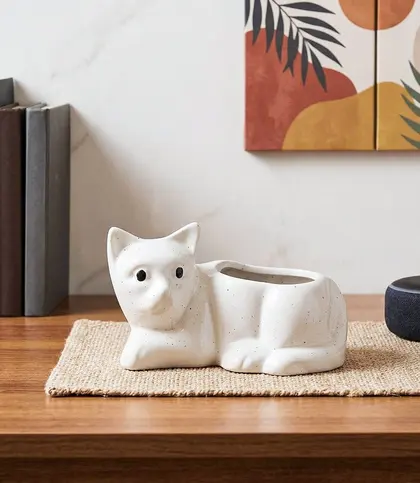
In a compact garden, resist the urge to fill every inch. One or two healthy plant clusters, a shallow water point, and a modest undisturbed corner can be more useful and manageable than an overcrowded bed. A compact planter can be useful for trialling one suitable planting; verify drainage holes, outdoor suitability, stability, and root room before planting.
- Try one small container planting before expanding if you are uncertain about light or watering needs.
- Use vertical space carefully, ensuring plants on every level receive suitable light.
- Choose shade-adapted plants for shaded spaces rather than attempting to compensate for missing sun.
Sold Out
₹189
₹349
46%OFF
A Simple Pollinator Garden Setup Checklist
Use this sequence to turn an idea into a manageable planting plan. Buy containers, tools, or accessories only after you have identified a practical need in the site assessment.
- Check sunlight, wind, drainage, safe placement, and water access.
- Select regional nectar plants and, where suitable, host plants for local insects.
- Spread flowering periods across the local growing seasons.
- Group plants by compatible light and watering needs.
- Add shallow water and at least one modest shelter or nesting option.
- Prepare a low-chemical maintenance routine based on observation and hand care.
- Review the garden after each season and adjust plant choices for performance and flowering gaps.
Frequently Asked Questions
These answers provide a starting point. Plant choices and bloom periods should always be checked against local conditions.
Start Small, Observe, and Improve
Begin with a planting scale you can maintain: a compact cluster of suitable plants is a stronger foundation than an ambitious garden that cannot be watered, monitored, or adapted. Watch which visitors arrive, when flowers fade, how quickly containers dry, and which plants cope best with the site.
Use those observations to refine the garden over time. Replace plants that are poorly matched to the conditions, expand successful groups, and retain safe natural shelter where it proves practical. A pollinator garden is most effective when it evolves with the space and the local life that uses it.
Final Verdict
- Choose the format that fits your available outdoor space and safety constraints: an in-ground bed for larger gardens, grouped containers for a terrace, or a small well-drained planting for a balcony.
- Select regionally appropriate nectar and host plants that match the site’s sunlight, climate, soil or container conditions, and your watering capacity.
- Create continuity with several flowering plants across the local seasons, group compatible plants together, and add shallow water plus modest shelter.
- Use observation, hand care, and targeted cultural controls before considering chemical treatments. A small, well-matched garden is more valuable than an overambitious planting that cannot be maintained.
FAQs
What is a pollinator garden?
A pollinator garden is a planted space designed to provide resources such as nectar, pollen, host foliage, water, shelter, and nesting opportunities for pollinating animals. It can be an in-ground bed, a terrace arrangement, or a few suitable containers.
Which pollinators can a home garden support?
Depending on region and conditions, a home garden may support bees, butterflies, moths, hoverflies, beetles, and other insects. Some regions also have pollinating birds or bats. No single garden serves every species, because food and nesting needs differ.
How do I choose pollinator plants for my climate?
Start with your site’s sunlight, soil or container conditions, rainfall pattern, wind, and local temperatures. Then confirm locally native or well-adapted choices through a regional nursery, botanical garden, conservation organisation, or horticultural extension source.
How much sunlight does a pollinator garden need?
Many flowering plants need substantial sun, but a pollinator garden does not need to be full sun in every location. Choose plants verified for the actual light level, whether that is full sun, partial sun, bright shade, or shade in your climate.
What plants provide food across multiple seasons?
The answer varies by location. Choose several compatible species with early-, mid-, and late-season flowering windows in your local climate, rather than relying on one plant. Local guidance can help you verify real bloom timing.
Do pollinator gardens need a water source?
A shallow water point can be helpful, particularly in dry conditions. Use a saucer or dish with stones or textured surfaces for safe landing, refresh it often, and clean it regularly to reduce stagnation.
How can I create a pollinator garden on a balcony?
Use a few stable, well-drained containers sized for the plants’ mature roots. First check balcony load limits, building rules, wind, drainage runoff, water access, and sunlight. Then group plants with similar needs and begin with a manageable number.
Which pesticides should I avoid in a pollinator garden?
Avoid routine broad-spectrum insecticides and do not spray open flowers or active pollinators. Use hand removal, pruning, better airflow, watering adjustments, and physical barriers first. Be cautious with systemic insecticides and ask about nursery growing practices when possible.